Why You Need UpdraftPlus & What the Free Version Backs Up
WordPress sites can sometimes experience display errors or crash completely due to theme or plugin updates, or even minor configuration mistakes. By taking a backup in advance using UpdraftPlus, you can easily restore your site to its normal state with just one click if trouble occurs.
Just knowing you have your backup data safely stored will dramatically change your peace of mind in daily site management!
By the way, regarding the difference between the UpdraftPlus free and Premium versions, the official description states that “the free version cannot back up WordPress core files or certain files like wp-config.php.”
This might make you wonder, “Is the free version dangerous?” But don’t worry—for standard WordPress site management, the free version is absolutely fine.
Why the Free Version of UpdraftPlus is Enough
- Your essential data is 100% saved: Your written articles (database), uploaded images, theme design settings, and plugins are all securely backed up with the free version.
- Core files can be reacquired: You can always download the WordPress core files for free from the official website and replace them if needed.
- Beginners don’t touch core files: Normally, you won’t directly edit the WordPress core or configuration files anyway, so the risk of breaking them is extremely low.
In short, your most important data—your site’s “design” and “article content”—is perfectly protected with the free version, so you can install it with confidence!
How to Install the UpdraftPlus WordPress Plugin
- Go to “Plugins” ➔ “Add New Plugin” in your dashboard menu.
- Type “UpdraftPlus” into the plugin search bar, select it from the list, and click “Install Now.”

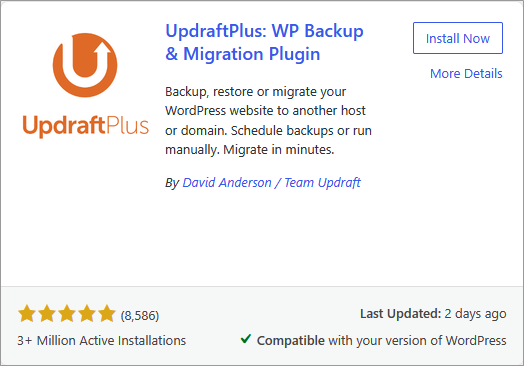
- Click “Activate.”

UpdraftPlus Google Drive Setup & Recommended Settings
Once you have installed and activated UpdraftPlus, let’s configure it to automatically save your backup data to Google Drive. If you only save backups on your rental server, you won’t be able to access your data if the server itself goes down. That’s why saving to external cloud storage is the safest approach.
Step 1: Open Settings and Select Google Drive as Your Storage
- Right after installing (activating) the plugin, you will likely see a welcome screen.
Click on “Press here to start!” or select “Settings.”
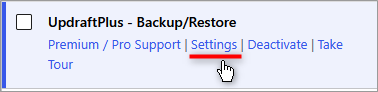
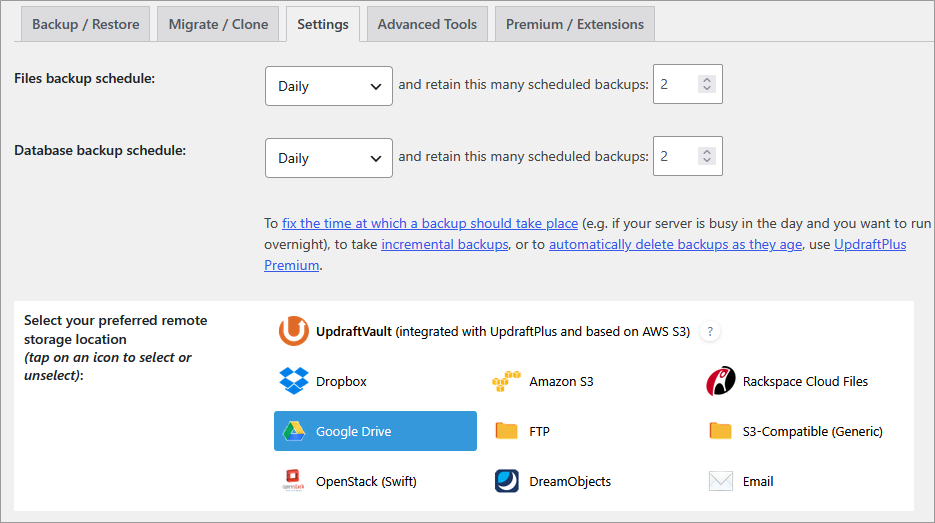
- Next, click on the “Settings” tab at the top to open it.

- Choose “Google Drive” from the icon list and scroll down the screen.
- Click on “Sign in with Google.”
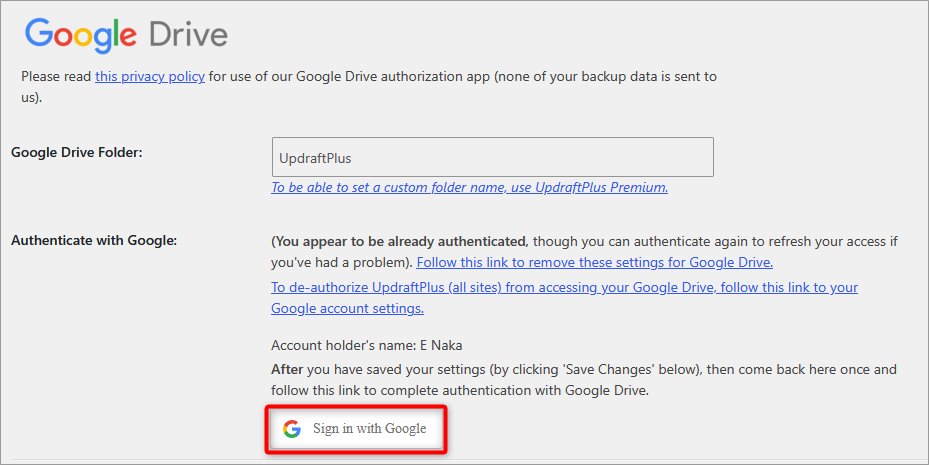
- Select the Google account you want to use and sign in.
- Click “Next” to proceed.
- Check the box for “See, edit, create, and delete only the specific Google Drive files you use with this app,” then click “Continue.”
- Click the “Complete setup” button in the center.

- Once you return to the initial screen, the backup destination change is complete.
Step 2: Configure Your Backup Schedule
Click the “Settings” tab once again.
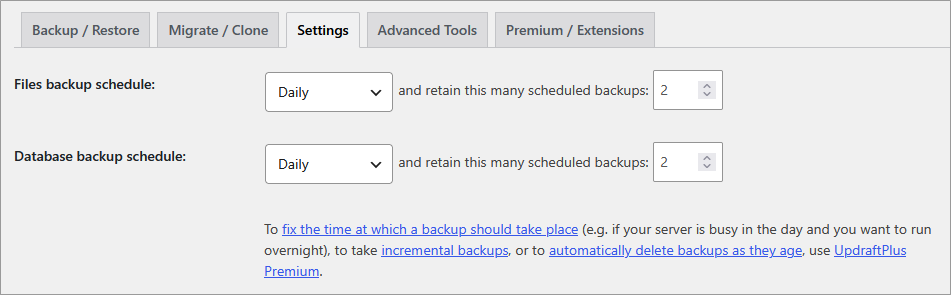
Configure the “Files backup schedule” and “Database backup schedule”. The recommended settings are as follows:
It’s best to back up the “Database”—which contains text data like your article content and comments—frequently. For “Files”—which include heavy data like images and themes—saving once a week is perfectly sufficient.
Step 3: Finally, Save Your Settings
Once you’ve configured your storage destination and schedule, scroll to the very bottom of the page and click the “Save Changes” button.
That’s it, your setup is complete!
How to Run Your First Manual Backup with UpdraftPlus
After finishing the setup, let’s run an initial manual backup to test if everything is working correctly.
Open the “Backup / Restore” tab in UpdraftPlus and click the large blue “Backup Now” button. When the confirmation screen pops up, simply execute “Backup Now.”
Once the progress bar completes and you see the message “The backup has finished running,” it’s a success!

![[2026 Latest] 5 Must-Have WordPress Plugins for Your Site!](https://martto.net/en/wp-content/uploads/2026/07/plugin_en.png "[2026 Latest] 5 Must-Have WordPress Plugins for Your Site!")
![[For Beginners] How to Set Up a Contact Page in WordPress using Contact Form 7](https://martto.net/en/wp-content/uploads/2026/07/Contact-Form-7_en-1.png "[For Beginners] How to Set Up a Contact Page in WordPress using Contact Form 7")
Comments