![[For Beginners] How to Set Up a Contact Page in WordPress using Contact Form 7](https://martto.net/en/wp-content/uploads/2026/07/Contact-Form-7_en-1.png "[For Beginners] How to Set Up a Contact Page in WordPress using Contact Form 7")
Setting Up a Contact Page with the Contact Form 7 Plugin
Prepare an Email Address for Inquiries
Before adding a contact form to your site, let’s prepare a dedicated email address for it. If you are using a custom domain, it could be something like info@xxxxxx.com.
Steps to Install and Activate Contact Form 7
First, we need to add the plugin to your WordPress site.
- From the left menu of your WordPress dashboard, click Plugins ➔ Add New Plugin.
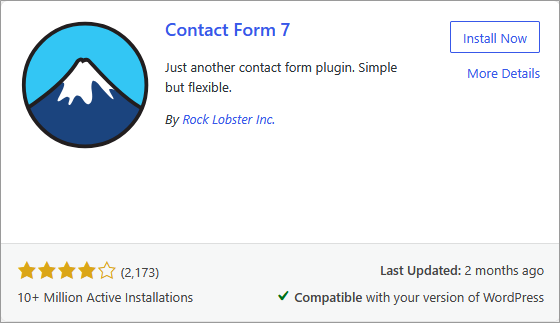
- Type Contact Form 7 into the search bar at the top right of the screen.
- When you see the plugin with the Mount Fuji icon, click Install Now.
- Once the installation is complete, click the Activate button.
Editing Your Contact Form 7 Settings
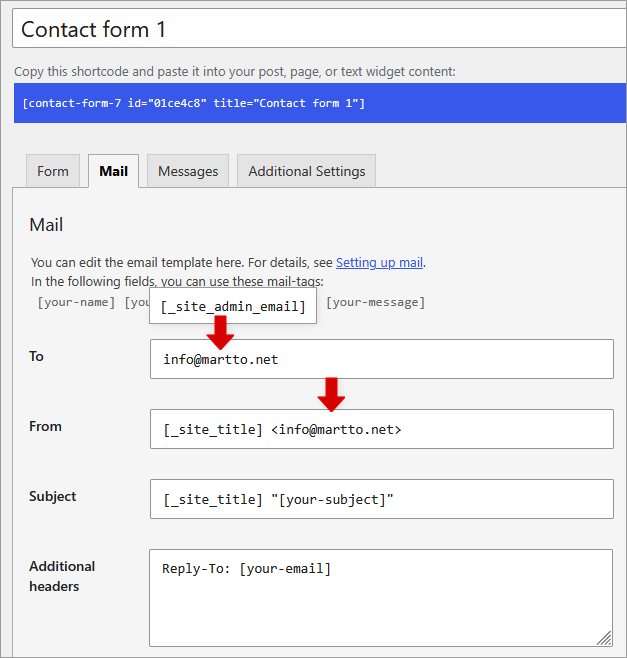
- Click Contact in the left menu to open the Contact Forms edit screen.
- Select the Mail tab at the top to configure your notification email address.
- Enter the dedicated email address you prepared earlier into both the To and From fields.
How to Use the Mail (2) Auto-Responder in Contact Form 7
Setting up an automatic confirmation email (like “We have received your inquiry”) gives your customers peace of mind after they submit a message.
Configuration Steps
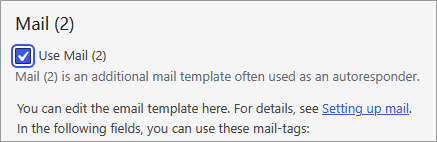
- Scroll down within the same Mail tab and check the Mail (2) box.
- In the From field, enter the email address you use for inquiries, formatted like this: [_site_title] <info@martto.net>.
- Next, take a look at the Additional Headers section on the screen.
By default, this says Reply-To: [_site_admin_email]. This ensures that if a reader replies directly to the auto-response email, their message will be sent to the site administrator’s email address.If they are the sameIf the email address used for your WordPress administrator (Users ➔ Profile) is the same as the one you are using to receive inquiries, you can leave this section exactly as it is! ◀◀If they are differentIf you want to use separate email addresses for “blog administration” and “contact form replies,” delete the [_site_admin_email] tag and change it to the specific email address where you want to receive replies. ◀◀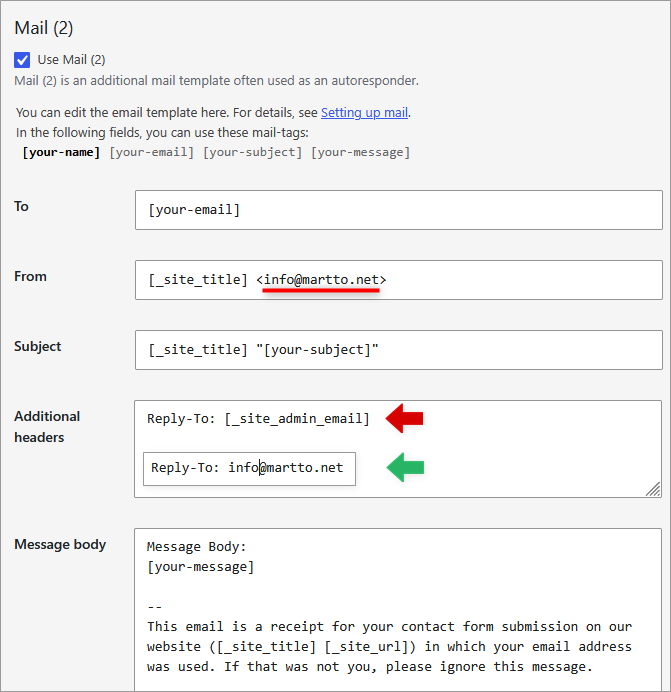
- In the Message Body field, you can freely type your auto-response message (e.g., “Thank you for your inquiry. We will get back to you within 〇 business days.”).
- Once you are done, click the Save button.
Adding the Contact Form 7 Shortcode to a Cocoon Page
This is the process to actually display the form you just created on your site. Contact Form 7 uses a short piece of text called a “shortcode” to embed forms into pages.
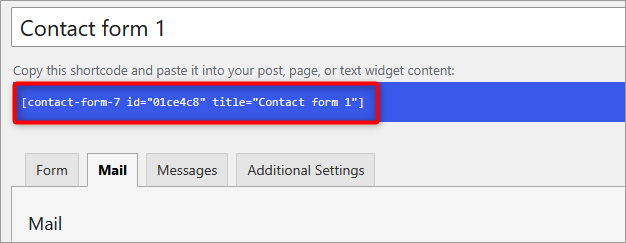
- After saving your form, a code with a blue background like [contact-form-7 id=”〇〇” title=”Contact form 1″] will appear right below the title. Copy this entire code.
- From the left menu of the dashboard, click Pages ➔ Add New Page.
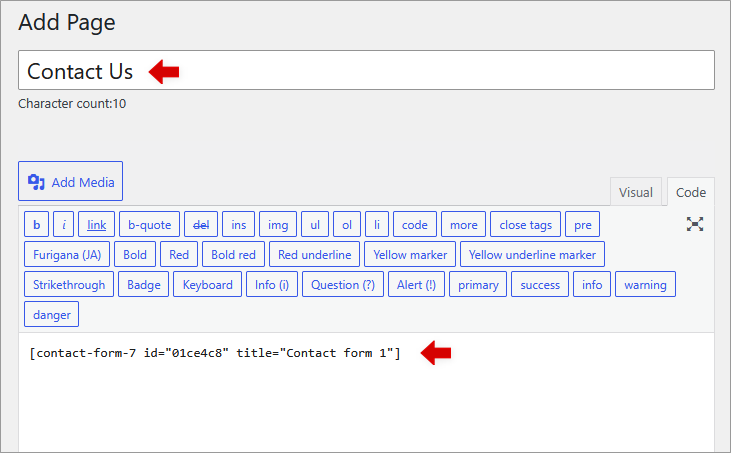
- Enter Contact Us as the title of the page.
- Paste the shortcode you copied earlier into the body of the page.
- Enter contact into the Permalink field.
- Click the Publish button on the right side of the screen.
Adding the Contact Page to Your Menu
Just creating a page won’t make it appear anywhere on your site, so let’s add it to your navigation menu!
- Click Appearance ➔ Menus.
- Check Contact Us from the list of Pages, and click Add to Menu.
- Save the menu.
Conclusion: Don’t Forget to Test Your Contact Form 7 Setup
Once your contact page is published, make sure to test it yourself to ensure it works correctly.
Open the contact page on your actual site and try sending a test message using your own email address. If you can confirm the following two points, you are all set!
Did the auto-response email configured in Mail (2) reach the email address you entered when submitting the form?
Make the most of Contact Form 7 to build a trustworthy and reliable website for your customers.
Next time, let’s enhance security by adding an image CAPTCHA!

![[Beginner’s Guide] How to Set Up Cloudflare Turnstile for Contact Form 7](https://martto.net/en/wp-content/uploads/2026/07/Cloudflare-Turnstile_en.png "[Beginner’s Guide] How to Set Up Cloudflare Turnstile for Contact Form 7")
Comments