![[Cocoon] A Complete Guide to Setting Up a “Correct Table of Contents” for High Visibility and SEO](https://martto.net/en/wp-content/uploads/2026/07/Table-of-Contents_en.png "[Cocoon] A Complete Guide to Setting Up a “Correct Table of Contents” for High Visibility and SEO")
🔴 Japanese
- Techniques to Organize Table of Contents Design and Prevent Readers from Getting Lost
- 1. The Core Rule of Headings: Generating a Table of Contents Correctly
- 2. Sleek Design: Adopting “Font Awesome” Instead of Emojis for Headings
- 3. Visibility First: The Golden Rule is to Keep the TOC “Expanded” by Default
- 4. Essential Setup for Monetization: Displaying the TOC Before Advertisements
- 5. Improving Convenience: Steps to Place a Sticky TOC in the Sidebar
- How to Add Font Awesome Icons to the Beginning of Headings
Techniques to Organize Table of Contents Design and Prevent Readers from Getting Lost
When running a blog on WordPress, a “Table of Contents” (TOC) is an essential feature to improve user convenience. However, simply displaying it with the default settings may mean you are not fully utilizing its effectiveness. In this article, based on the popular free theme “Cocoon,” we will explain customizable techniques for a beautiful and functional table of contents that prevents reader bounce and is highly evaluated by search engines (Google).
1. The Core Rule of Headings: Generating a Table of Contents Correctly
The table of contents in Cocoon is automatically generated based on the heading tags (H tags) placed within the body text. Therefore, to make the TOC function correctly, the following strict rule must be observed.
In WordPress, the article title is automatically assigned the “H1” tag. Therefore, the largest heading used first in the body text must always start with “H2”. Skipping H2 and starting with “H3” will disrupt the hierarchical structure of the TOC, causing confusion for readers and misrecognition by search engines.
2. Sleek Design: Adopting “Font Awesome” Instead of Emojis for Headings
Entering emojis directly at the beginning of headings adds a friendly touch, but with Cocoon’s default specifications, those emojis will be reflected directly in the TOC text as well.
Since a table of contents should be a “concise map” of the entire article, keeping the text inside the TOC limited to words only provides a much higher visual readability (the beauty of subtraction).
Therefore, we recommend using “Font Awesome Icons” to decorate your headings. With this method, you can stylishly showcase the headings within the article while keeping the automatically generated TOC text smart and clean.
3. Visibility First: The Golden Rule is to Keep the TOC “Expanded” by Default
In the Cocoon settings, you can choose whether the initial state of the TOC is “Collapsed” or “Expanded.” Without hesitation, please set this to “Expanded” (open by default).
In today’s mobile-first era, readers look for information in a short amount of time. A user-friendly design where the entire volume and target items are visible within one second of opening the article is a powerful factor in preventing page abandonment. While modern Googlebots can understand collapsed (hidden) text, there is still a tendency to judge that “text visible from the beginning” carries higher importance. To correctly convey important keywords contained in headings to Google as main elements of the page, it is safer to keep it expanded.
4. Essential Setup for Monetization: Displaying the TOC Before Advertisements
This section explains an easily overlooked but important item located in the “TOC” tab of the Cocoon settings.
- ✅ Display the TOC before advertisements ➔ 【Be sure to check this box】
If you have automatic advertisements such as Google AdSense enabled, a huge ad may cut in and display right before the first H2 heading depending on the settings. By checking this box, you can ensure that the TOC is placed before the advertisement, securing a smooth user flow that does not cause stress to your readers.
5. Improving Convenience: Steps to Place a Sticky TOC in the Sidebar
In a PC environment, a “Sticky TOC” that stays on the side of the screen even when scrolling is highly effective as it helps readers easily track their current location. The setup can be easily completed with the following steps.
- From the WordPress admin dashboard, navigate to “Appearance” ➔ “Widgets”.
- Find “[C] Table of contents” from the “Available Widgets” list.
- Drag and drop the target widget into the “Sidebar scroll following” area on the right.
With these simple operations, a functional sticky TOC linked to the reader’s scrolling will be implemented.
How to Add Font Awesome Icons to the Beginning of Headings
While we have covered the Cocoon TOC settings so far, we will now introduce a specific customization method to further refine the design of your headings and completely avoid troubles such as TOC bugs.
Instead of directly writing the icon’s HTML code (i tag) into the heading, the smartest and most sophisticated method is to use the CSS (stylesheet) of the entire theme to display icons at the beginning of all headings at once.
CSS Code for Bulk Display
Please copy and paste the following CSS code directly into your child theme’s stylesheet (style.css) or via “Appearance” ➔ “Customize” to “Additional CSS” and save it.
/* Display your favorite icon at the beginning of H2 headings */
.article h2::before {
    font-family: "Font Awesome 5 Free";
    font-weight: 900; /* Required for Solid icons */
    content: "\f009"; /* Unicode */
    margin-right: 0.4em; /* Gap between the icon and the text on the right */
}

/* Display your favorite icon at the beginning of H3 headings */
.article h3::before {
    font-family: "Font Awesome 5 Free";
    font-weight: 900; /* Required for Solid icons */
    content: "\f00c"; /* Unicode */
    margin-right: 0.4em; /* Gap between the icon and the text on the right */
}
How to Change Font Icons
- Access Find Free Icons on the Font Awesome 5 Official Website.
As of July 2026, there are more than 1,600 free items available in Font Awesome 5.
Once the page opens, click the 1 [Free] button in the upper left to filter the results. At that time, make sure the version on the right side is 2 “Font Awesome 5.x”. The aforementioned CSS code “font-weight: 900;” is a required code when you select 3 Solid on the left side.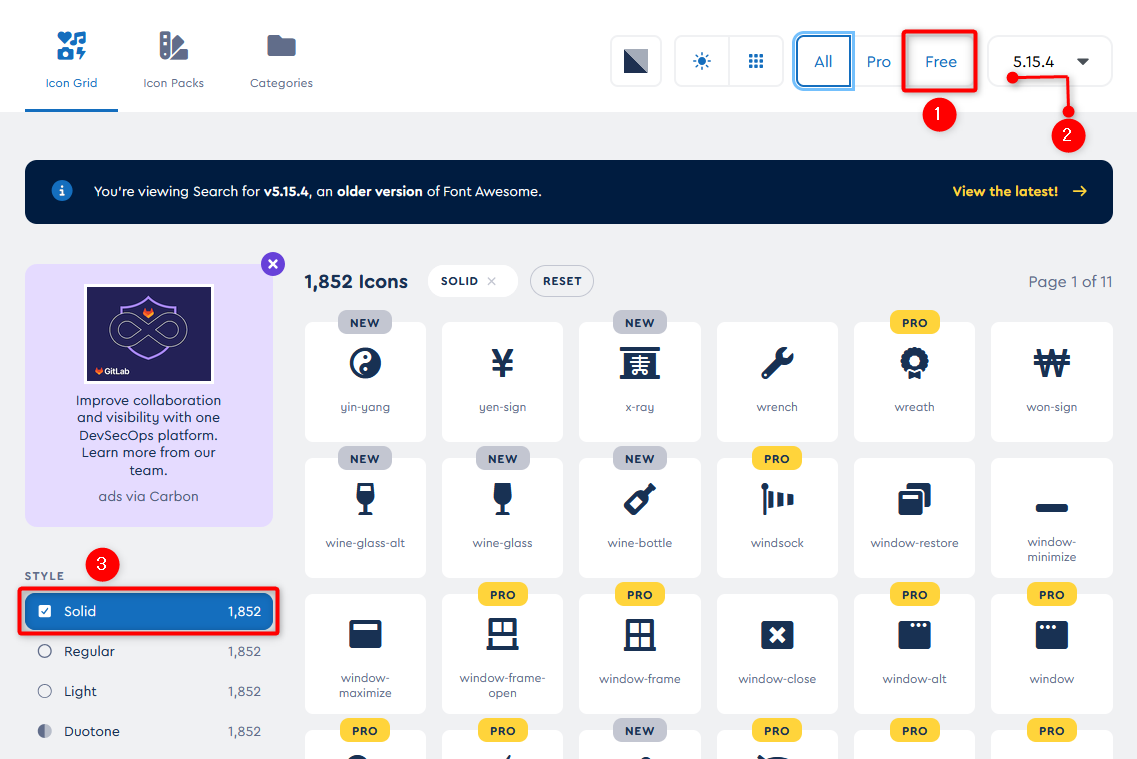
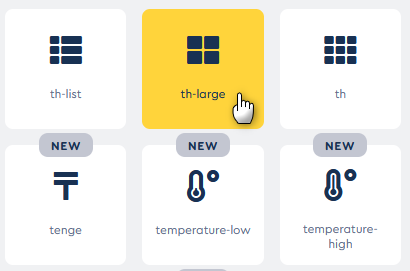
- Click and open the icon you want to display.
- Click [Copy Unicode] in the upper right. (It will be copied to your clipboard.)
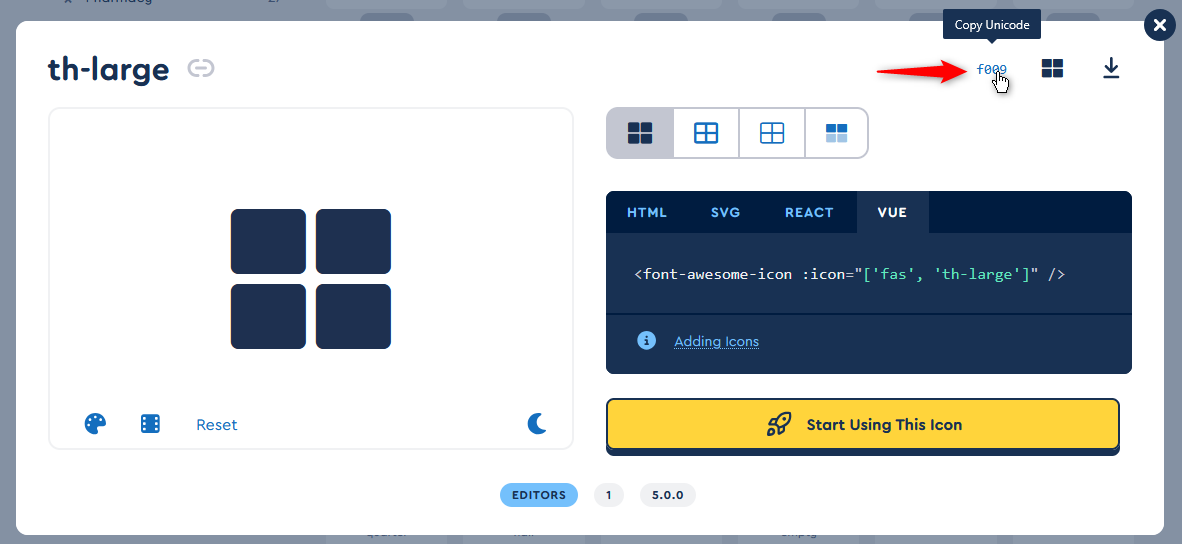
- Paste it into the
content: "\f009"; /* Unicode */part of the previous CSS code.👍 If it is displayed like this, it is successful!

Similarly, choose your favorite icons and set them up for H3 (and H4 if necessary)!
Benefits of Customization
By applying this customization, different font icon designs will automatically display at the beginning of H2 and H3 headings, creating a clear visual contrast.
Since it does not pollute the HTML code at all, when writing articles, you only need to write regular text as usual, and the uniform design will be automatically reflected. Of course, the content of the automatically generated TOC will be built cleanly with text only.
Once set up, it will instantly unify past and future articles into a beautiful design. Please try integrating this to improve blog workflow and design quality!

Comments