
When you install WordPress and the free theme “Cocoon” and open your dashboard for the first time, are you on the verge of tears looking at the endless mountain of tabs in the “Cocoon Settings” menu? 😂 “Where on earth do I even start?!” Don’t worry! You don’t have to configure every single item from scratch!
This time, I’ve carefully selected only the “absolute most critical settings you must lock in right now, because changing them later is a massive pain.” If you set these correctly at the beginning, you can avoid 99% of future headaches!
- 1. Skins: Transform into a Professional Design in Just 1 Second!
- 2. Overall: Selecting Your Site Icon Font Version
- 3. Header Layout: Just Start with This for Now!
- 4. OGP: Home Image Setting Is Your “Site Billboard”
- 5. Access Analysis: Uncheck “Include Administrator in Access Analysis”
- 6. Column Tab: Decide Content Width and Sidebar Width First
- 7. Image Tab: The Big Divide on Automatically Displaying the Eye-Catch Image
- 8. Footer Tab: Check the “Credit Notation” at the Very Bottom
- 9. Editor Tab: Save Massive Time in the AI Era with the “Classic Editor”
- Escape the Maze! Use the “Settings Index” Covering All 36 Tabs
- Conclusion: Once Your Foundation Is Locked, Your Blog Is Unstoppable!
1. Skins: Transform into a Professional Design in Just 1 Second!
Let’s start with the “Skin” tab to instantly boost your motivation!
Cocoon comes built-in with a genius dress-up feature (Skins) that changes your entire site’s design with just one click. You don’t need to write a single line of complex CSS; a beautiful blog crafted by professional designers will be born right then and there!
Pick your favorite vibe and let’s quickly tidy up the look of your digital castle! ✨
2. Overall: Selecting Your Site Icon Font Version
“I followed the manual perfectly, but my icons aren’t showing up… 😭” This is the number one issue that trips up beginners! It’s all about the “Site Icon” settings!
Make sure to check and select the version of Font Awesome you will use here. Why? Because the way you write the code to display icons completely changes depending on the version you choose!
In the “Overall” tab of Cocoon settings, make no mistake and select “Font Awesome 5.”

The decorative codes for sidebars and menus introduced in this guidebook are all standardized based on the “Font Awesome 5” specification. To avoid getting lost in a setting maze later wondering why your icons aren’t showing up, locking this in as “5” right when you start your blog is the ultimate secret to a smooth site build.
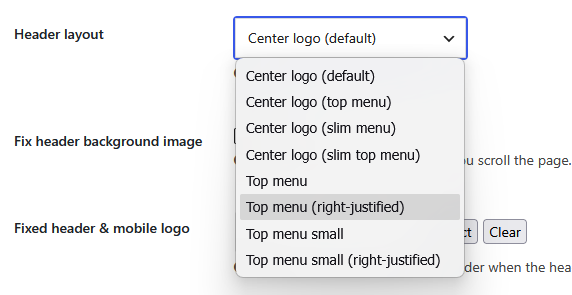
3. Header Layout: Just Start with This for Now!
In the “Header” tab, you decide the layout of the very top of your blog—essentially its “face.”
While it’s tempting to try fancy arrangements, don’t get greedy at first. “Just start with this for now” and lock in a simple layout. Instead of wasting time overthinking the design, it’s much smarter to set up a clean banner with just text!
Basically, any design works fine, but in the early stages when you haven’t decided on a header image or created a logo, choosing “Top Menu (Right-Aligned)” or something similar to keep the header slim is a great idea.
4. OGP: Home Image Setting Is Your “Site Billboard”
Next up is a setting that often gets overlooked: the “Home Image” under the “OGP” tab!
Do you know what this is for? It’s actually a crucial image that displays in a big way when your site’s top page is shared on social media or featured as a “blog card” on other websites!
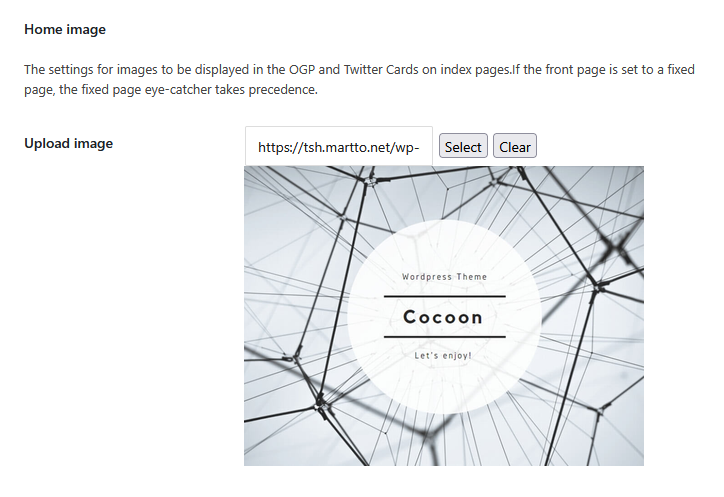
If you leave this empty, Cocoon’s default image will show up instead, making your site lose its unique identity. Make sure to pack one stunning image here to act as your site’s “business card”! 📸
However, as mentioned in the description, if your front page is set to a static page, the eye-catch image of that static page will take priority.
So, what size (ratio) should you use for this “Home Image”?
The bottom line is, choose the golden size of “1200 pixels wide × 675 pixels high (16:9 ratio)” without hesitation. This isn’t just to match your eye-catch image standards; it’s because the global standard for major social media platforms (like X and Facebook) specifies a “16:9” OGP image size.
If you use a random square or vertical image, when your blog URL is shared on social media, the sides or top/bottom will be forcefully cropped on the timeline, causing a disaster where your logo or important text gets cut in half.
Furthermore, when other bloggers introduce your top page using a “blog card,” having it in this 16:9 size ensures your beautiful “site billboard” displays perfectly without messing up their site’s layout. Since it’s the face of your site and your ultimate business card, stick strictly to the “1200×675 (16:9)” rule to keep everything looking flawless! 👍
5. Access Analysis: Uncheck “Include Administrator in Access Analysis”
Once you open the “Access Analysis Settings” tab, absolutely uncheck the box that says “Include site administrator (yourself) in access analysis”!
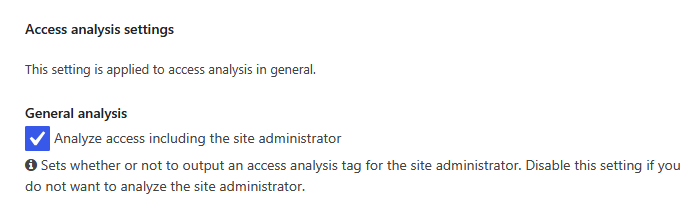
If this box stays checked, every time you tweak the design or preview your posts, it will all count toward your page views (PV). Avoid the heartbreaking “beginner trap” of celebrating, “OMG, I got 100 PV today! I’m a genius! 😍” only to realize it was entirely your own traffic (self-promotion) (laughs). This is a must-have setting to gather accurate data!
6. Column Tab: Decide Content Width and Sidebar Width First
In the “Column” tab, you determine the width of your post content area and your sidebar in pixels.
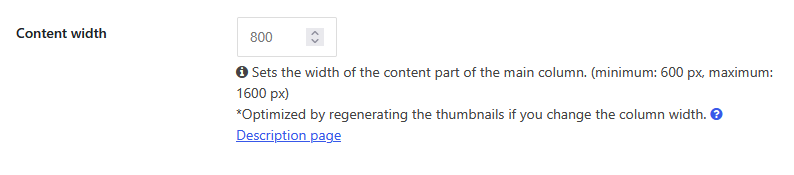
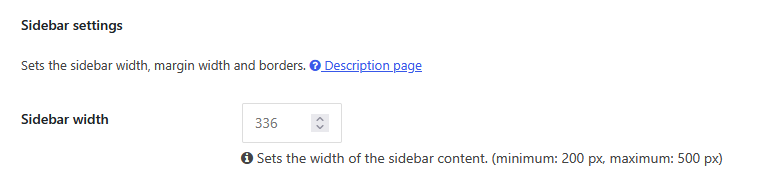
If you think, “Can’t I just change that later?” you will regret it.
If you don’t lock these widths in first, it can drastically impact the display size of the images and diagrams you create inside your posts later on. Lock in the width of your digital castle cleanly right from the start!
7. Image Tab: The Big Divide on Automatically Displaying the Eye-Catch Image
In the “Image” tab, make sure to check whether “Display eye-catch image at the top of the post” is enabled. This single checkbox has a massive impact on the overall look of your site!
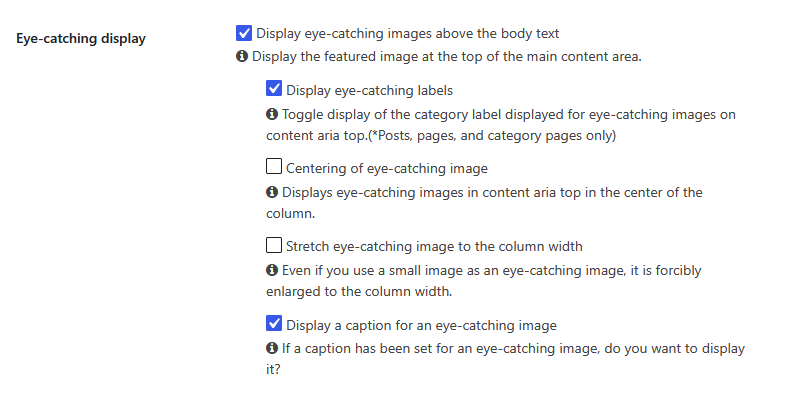
I highly recommend keeping it set to “Auto-display.” If you don’t notice this and get into the habit of manually pasting the eye-catch image at the top of every post, when you change themes or designs later, you’ll trigger a bug where the same image displays twice. You’ll end up manually deleting images from past posts one by one while crying your eyes out! 😱
Plus, the “Thumbnail Image Size” you choose here is super important! Since it serves as the baseline for cropping your images, if you don’t lock this in early, you’ll regret it big time later!
The golden size of “1200 pixels wide × 675 pixels high (16:9 ratio)” is the way to go!
8. Footer Tab: Check the “Credit Notation” at the Very Bottom
In the “Footer” tab, you review the credit notation, such as the copyright mark (© All Rights Reserved.), located at the very bottom of your site.
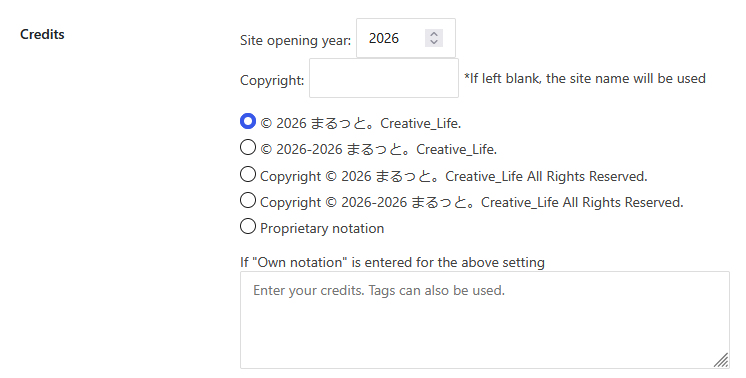
Leaving it as default can result in unnecessary text or a slightly amateurish look, so let’s clean it up into a sleek, professional notation. A site that looks sharp all the way down to its feet instantly gives off a “pro blog” vibe, so make sure to check this!
9. Editor Tab: Save Massive Time in the AI Era with the “Classic Editor”
Finally, the setting that will make the biggest difference going forward: the “Editor” tab! Here, you choose whether your WordPress writing environment uses the latest “Block Editor (Gutenberg)” or the traditional “Classic Editor (Text Mode).”
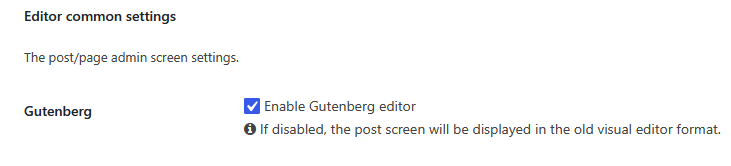
It is enabled by default. The latest version might seem better, but if you want to use “AI” like ChatGPT or Gemini as your partner to write posts at lightning speed, the Classic Editor (Text Mode) is overwhelmingly more convenient!
Why? Because when you ask an AI to write decorative elements or codes for your post, the Block Editor tends to fragment the code in unintended places or completely break the blocks, making them highly incompatible. For seamless HTML transfer and complete control over your code, Text Mode (which can easily switch to Visual Mode) is the only choice. On this site, all tutorials will be based exclusively on Text Mode (and Visual Mode).
Escape the Maze! Use the “Settings Index” Covering All 36 Tabs
While we focused heavily on the “9 absolute most critical items to touch first,” there are still deep configurations and hidden commands sleeping within Cocoon’s 36 tabs.
For moments when you wonder, “What’s in the other tabs?” or “I want to tweak a different setting now that I’m blogging more,” the admin has prepared a 【Complete Index Page】 where you can pull up every single setting item in a snap! ✨ Just type what you’re looking for into the search bar, and you’ll instantly find which tab it’s hidden in!
Bookmark this page to use as your dictionary whenever you get stuck! 👇
👉 【Index】Complete Index of All 36 Cocoon Tabs & Individual Menus
Going forward, whenever I write an article covering specific settings, I will add internal links to those posts using this index page as a hub. Please make full use of it!
Conclusion: Once Your Foundation Is Locked, Your Blog Is Unstoppable!
Great job! Every single item introduced today falls under the category of “critical settings that will make your blog fall apart if you touch them later, leaving you in tears.”
Before you get frozen and lost in the 36-tab maze, let’s lock in these carefully selected configurations and solidify the foundation of your castle!
As long as your site’s foundation is solid, even if you run into a broken layout while customizing later, it will be much easier to find a solution.
Next time, I’ll show you specific points where changing a setting can make your layout look even more stylish!


Comments