
今日はお問い合わせフォームにメールアドレスの確認用入力欄を設置する方法と、プレースホルダーテキストの表示方法についてのご案内です。
お使いになる方は必ず「あとがき」までお読みください。
メールアドレスの確認用入力欄を設置する
子テーマの【functions.php】に以下のコードを追加する
/* contact form 7 メールアドレス確認用 */
function wpcf7_text_validation_filter_extend( $result, $tag ) {
global $my_email_confirm;
$tag = new WPCF7_Shortcode( $tag );
$name = $tag->name;
$value = isset( $_POST[$name] )
? trim( wp_unslash( strtr( (string) $_POST[$name], "\n", " " ) ) ): '';
if ($name == "your-email"){
$my_email_confirm=$value;
}
if ($name == "your-email-confirm" && $my_email_confirm != $value){
$result->invalidate( $tag,"確認用のメールアドレスが一致していません");
}
return $result;
}
add_filter( 'wpcf7_validate_email', 'wpcf7_text_validation_filter_extend', 11, 2 );
add_filter( 'wpcf7_validate_email*', 'wpcf7_text_validation_filter_extend', 11, 2 );
Contact Form 7のテンプレート欄に以下の項目を追加する
[email* your-email-confirm]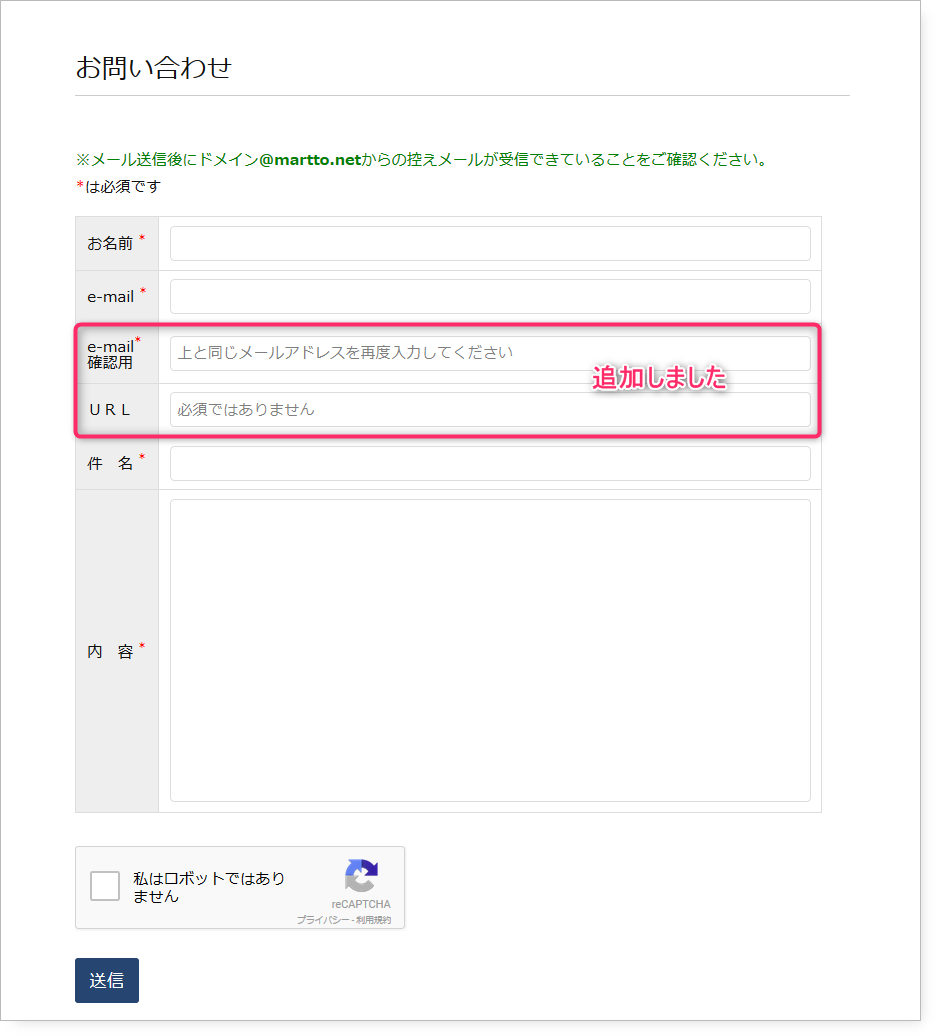
入力する方としては面倒なフォームですが、肝心のメールアドレスが誤って入力されていると、せっかくお返事を差し上げても無駄になってしまいます。
使う使わないは別として、最初からプラグインに装備されていると良かったのですが。。。
プレースホルダーテキストを表示する
入力欄の背景にグレーの薄い文字で書いてあるのが「プレースホルダーテキスト」です。
下のように使います。
[email* your-email-confirm placeholder "上と同じメールアドレスを再度入力してください"]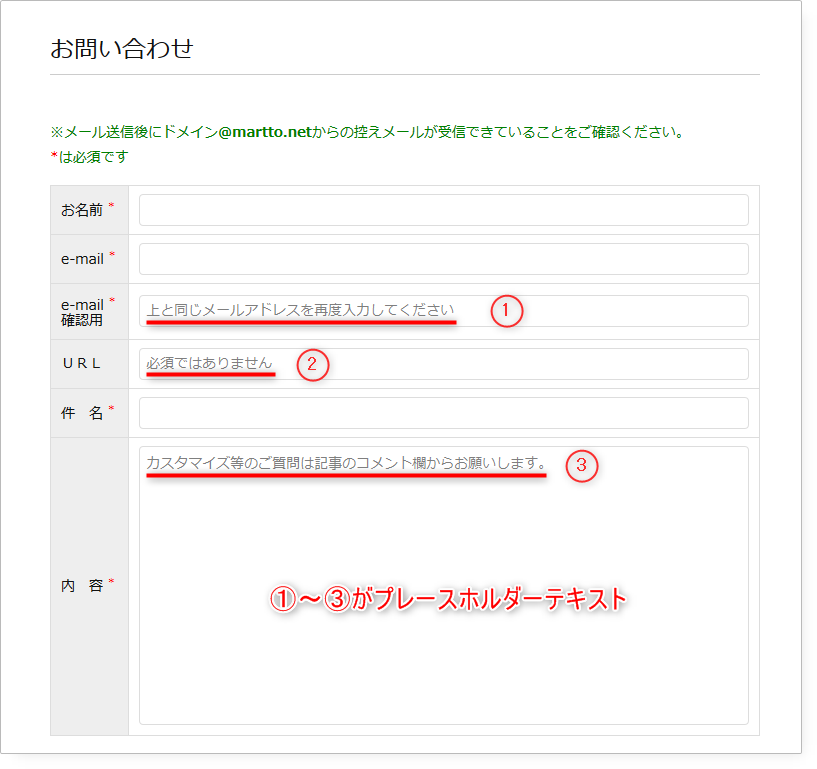
お問い合わせフォームのテンプレート実例
表形式のお問い合わせ
<span class="red">*</span>は必須です</p>
<table class="table">
<tbody>
<tr>
<th>お名前 <span class="red">*</span></th>
<td>  [text* your-name] </td>
</tr>
<tr>
<th>e-mail <span class="red">*</span></th>
<td> [email* your-email] </td>
</tr>
<tr>
<th style="line-height:110%;">e-mail <span class="red">*</span><br>確認用</th>
<td> [email* your-email-confirm placeholder "上と同じメールアドレスを再度入力してください"] </td>
</tr>
<tr>
<th>URL</th>
<td> [url url placeholder "必須ではありません"] </td>
</tr>
<tr>
<th>件 名 <span class="red">*</span></th>
<td>  [text* your-subject] </td>
</tr>
<tr>
<th>内 容 <span class="red">*</span></th>
<td> [textarea* your-message] </td>
</tr>
</tbody>
</table>
[recaptcha class:recp]

[submit "送信"]
テーブル用のCSS
/* お問い合わせフォーム(表) */
input[type="text"], input[type="email"], input[type="url"] {
    height: 32px;
}
input[type="text"], input[type="email"], input[type="url"], textarea {
    width: 100%;
    padding: 4px 6px;
    border-radius: 4px;
    border: 1px solid #ddd;
    resize: none;
}
.post td, .post th {
    padding: 8px 10px;
    border: 1px solid #ddd;
}
.table th {
    padding: 10px;
    font-weight: normal;
    background: #eee;
    text-align: left;
    white-space: nowrap;
}
th > .red{
	font-size:0.8em;
	color:red;
	vertical-align:super;
}
.recp{
	margin-bottom:25px;
}
あとがき
以前に書いたお問い合わせフォームのカスタマイズ記事とCSSは一緒ですので、すでに追記済みの方は二重になりますので、不要です。
また、functions.phpを触りますので、ミスをするとWordPressが真っ白になり使えなくなります。いつでも戻せるように必ずバックアップを取っておきましょう。
その際は、FTP転送ツールを使用してfunctions.phpの内容を元に戻せば大丈夫です。
お問い合わせフォームにURLの入力欄を設置しただけでは、サイト管理者が受け取るメールにURLの表記がありません。
コンタクトフォームの編集画面でメールタブを開き、メッセージ本文にurlを追加しましょう。
差出人: [your-name] <[your-email]>
題名: [your-subject]
URL:[url]←これを追加しましょう
ではお気をつけてぇ(* ̄▽ ̄)ノ~~
こちらもどうぞ
お問い合わせフォームを設置する方法


コメント Leave a Comment